
How to make an Auto scrollable Gallery Control in Power Apps
Ever found yourself wanting to add an auto-scrolling feature to your PowerApps gallery control? While it's not a standard option, you're in for a treat. I'll guide you through the process of making your gallery automatically scroll in PowerApps, and it's easier than you might think. Let's dive into the step-by-step instructions!"
Launch Power Apps
- Open Power Apps by visiting make.powerapps.com and signing in with your Microsoft account.
- Next create a New App or Open an Existing App.
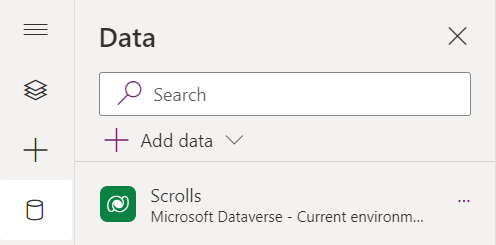
- Afterward, establish a connection to your data source by selecting the SharePoint list or Dataverse table you've created.
Let's explore some straightforward examples to illustrate filter queries:
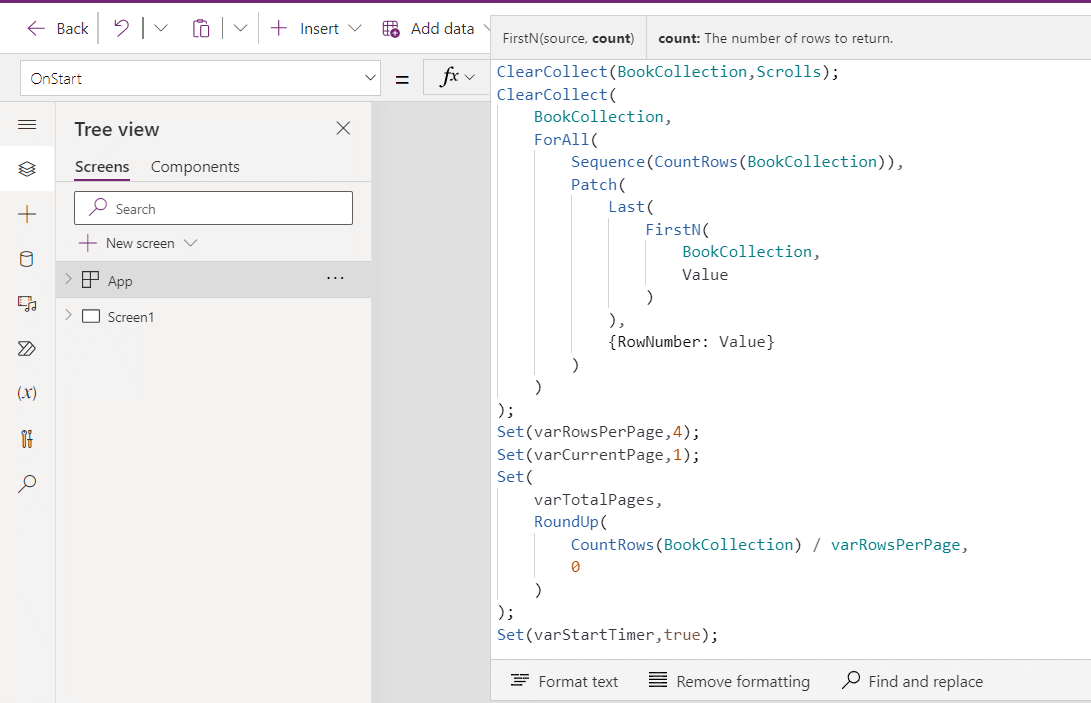
Code:
ClearCollect(
     BookCollection, 	//(Replace BookCollection with your Collection)
Scrolls);  		//(Replace this with your Data Source)
ClearCollect(
    BookCollection,
    ForAll(
        Sequence(CountRows(BookCollection)),
        Patch(
            Last(
                FirstN(
                    BookCollection,
                    Value
                )
            ),
            {RowNumber: Value}
        )
    )
);
Set(varRowsPerPage,4);
Set(varCurrentPage,1);
Set(
    varTotalPages,
    RoundUp(
        CountRows(BookCollection) / varRowsPerPage,
        0
    )
);
Set(varStartTimer,true);
Add or Select a screen
- Now Add a New screen or select one in which you want scrollable gallery.
Insert a Gallery Control
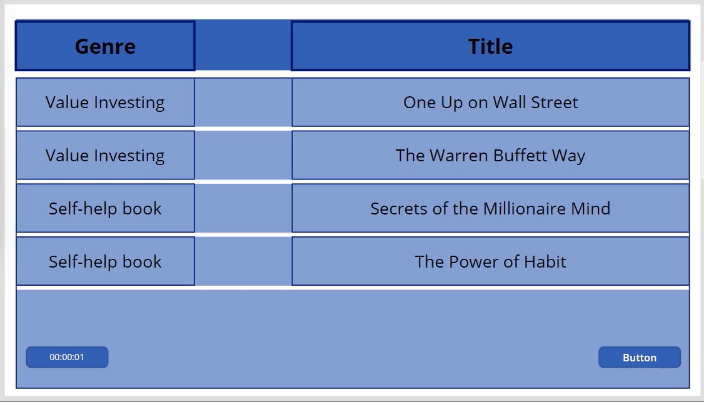
- Choose 'Gallery' from the ’Insert’ menu, and you'll see options for different types of galleries. Select 'Blank vertical gallery'.
- Now, add labels inside the gallery control's template to display the text. Update the Text property of each label control to reflect the appropriate data fields from your data source.
- Drag and drop a blank vertical gallery control onto your page, and update the Item property with the following code. Additionally, set the properties as indicated:
- ShowScrollBar: false
- ShowNavigation: false
- Items Property:
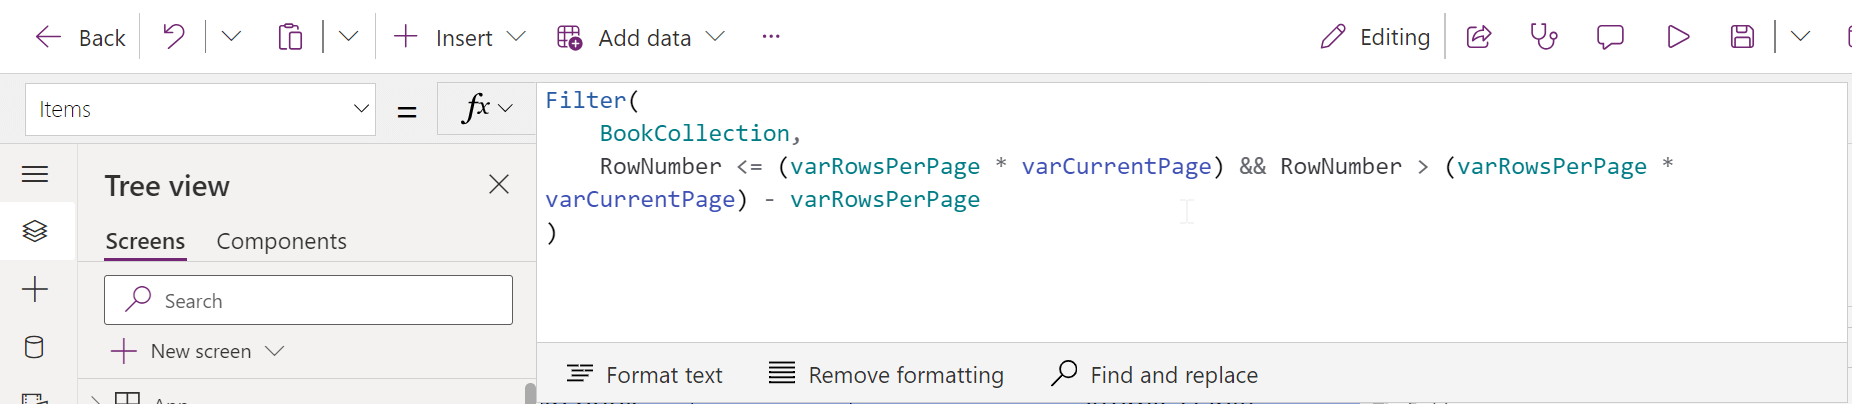
Code:
Filter(
    BookCollection,
    RowNumber <= (varRowsPerPage * varCurrentPage) && RowNumber > (varRowsPerPage * varCurrentPage) - varRowsPerPage
)
Insert Power Apps Timer Control
- Drag and drop a PowerApps timer control onto your page, and configure the following properties:
- Duration: Set the desired duration for the timer, e.g., 1000 (1 second).
- AutoStart: Set it to "true" if you want the timer to start automatically when the screen is loaded.
- Start: varStartTimer
- Repeat: true
- AutoPause: true
- OnTimerEnd: Enter the following code
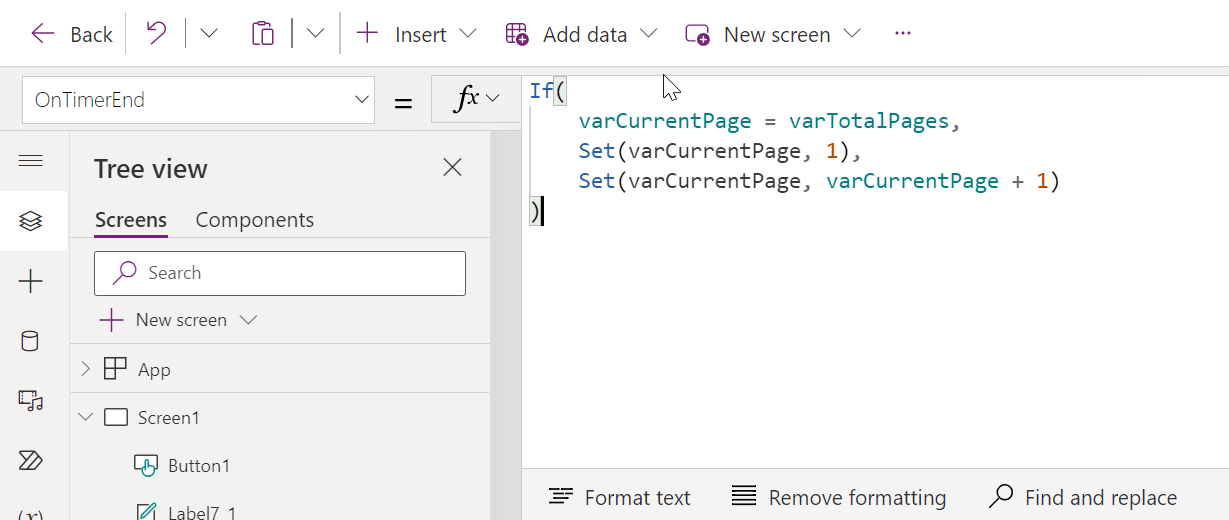
Code:
If(
    varCurrentPage = varTotalPages,
    Set(varCurrentPage, 1),
    Set(varCurrentPage, varCurrentPage + 1)
)
By following these steps, you can add an impressive auto-scrolling feature to your PowerApps gallery control, providing a dynamic and engaging user experience. This creative solution allows you to display content in a more interactive and visually appealing way. Experiment with different scroll speeds and durations to find the perfect balance for your specific use case.
We hope this guide has been helpful in expanding your PowerApps toolkit.
If you have any doubts or questions related to this blog, you can Contact us by Email: info@voxtus.com
Sumit Joshi
Power Apps Consultant